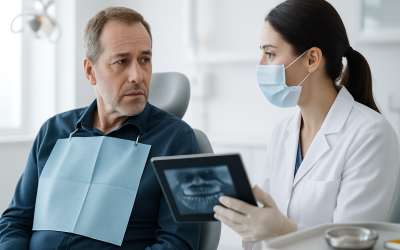
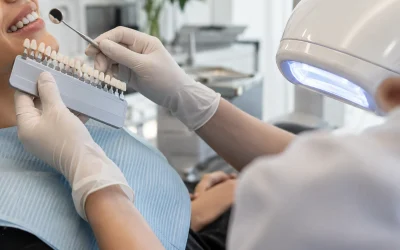
A veneer that chips, debonds, or causes persistent sensitivity within weeks is more than a nuisance—it is a signal that something went wrong during the planning or placement stage. When Veneers Fail Early, the cause is typically a correctable technical issue rather than a permanent failure of the material.
This guide analyzes the five primary root causes of premature failure: bonding contamination, bite interferences (occlusion), design errors, parafunctional habits like grinding, and marginal hygiene issues. By identifying whether the problem lies in the clinical protocol or daily habits, we can implement the necessary corrections—ranging from simple adjustments to laboratory remakes—to ensure your restorations remain functional and beautiful for the long term.
How Clinicians Evaluate When Veneers Fail Early
Early veneer failure is not a single diagnosis but a strategic framework. To identify the solution, clinicians categorize the failure into three specific areas:
-
Mechanical Failures: Focuses on debonding or porcelain fractures.
-
Biological Failures: Addresses persistent sensitivity or chronic gum inflammation.
-
Functional Problems: Analyzes bite-related breakage and occlusal stress.
This classification dictates the correction path, whether it requires a simple chairside adjustment, a laboratory remake, or a protective nightguard. By reviewing your post-op history—such as “high spots” felt during placement or signs of grinding—your dentist can quickly narrow down the root cause and prevent the cycle of failure from repeating.
1. Inadequate enamel bonding or contamination control
What it looks like clinically
When bonding is compromised you will see veneers that pop off, lift at the margins, or allow microleakage and staining along the edges within weeks. Clinically the restoration may appear intact but feels mobile on probing or during gentle biting pressure. Patients often report sudden sensitivity to cold or air in the same timeframe. Occasionally, a veneer may fall out entirely while chewing soft food; other times the restoration remains but shows a brown line at the margin as oral fluids infiltrate the unsealed interface.
Why it happens
Veneer bonding depends on a sequence: appropriate enamel preparation, isolation (usually rubber dam), correct etching and priming, a clean, uncontaminated field, and a compatible resin cement. Any interruption — salivary contamination, over-wet or over-dry enamel, improper etch time, or using an incompatible cement for the laboratory finish — increases the risk of early debonding. In-office shortcuts or difficult isolation in the anterior can be the root problem rather than the veneer material itself.
Typical correction path
First, the clinician confirms the diagnosis with visual inspection, bite testing, and removal to assess the fit. If the veneer is intact and the internal surface shows no gross defects, a re-bond under strict isolation is often successful. If the internal surface or margin was damaged during placement or the veneer was contaminated in the lab or during try-in, a remake will be necessary. After re-bonding or remake, patients may receive hygiene coaching and a follow-up schedule to watch for margin staining or microleakage.
Because patient education matters, many dentists explain the difference between trying-in (where veneers are placed dry for esthetic checks) and final cementation; if contamination occurred at either step, re-treatment is typically the right path. For detailed steps about the sequencing and preparation clinicians use, a helpful resource is our article of the dental veneers process, which outlines treatment stages and where contamination risks can arise.
2. Unaddressed bite interferences and occlusal issues
What it looks like clinically
Bite-related problems usually show as fractures, chipping at the incisal edge, or veneers debonding under heavy loads. Clinically you might note wear facets on opposing teeth, a history of altered bite awareness after placement, or premature contact when guiding the patient into excursive movements. Patients may report clicking or a new “high spot” as soon as they bite down. In some cases, opposing natural teeth may also show fresh wear from an uneven contact point.
Why it happens
When a new veneer changes tooth height or contour without a comprehensive occlusal plan, it can create premature contacts. That extra targeted stress concentrates loads on a veneer’s weakest area — junctions, cement lines, or thin porcelain — leading to early failure. If the existing bite had parafunctional loads (grinding, clenching), these must be addressed before or during veneer therapy; otherwise, the restorations bear the brunt of destructive forces.
Typical correction path
Diagnosis often requires mounted models and occlusal analysis to locate interferences. Minor premature contacts can sometimes be corrected with careful occlusal adjustment and polishing. More significant mismatches require remakes with adjusted contours to distribute forces better, or the incorporation of protective strategies such as nightguards or restorative changes to opposing dentition. The realistic expectation should be explained: occlusal equilibration and splint therapy take time, and protective appliances are often long-term solutions rather than temporary fixes.
Detecting the difference: adjustment versus remake
A chairside adjustment is indicated when a single contact or cusp causes disproportionate stress; a remake is indicated when the entire occlusal scheme or the veneer’s design systematically produces overload. If multiple restorations fail in the same arch, the clinician generally assumes a bite-design issue and plans for broader occlusal rehabilitation rather than repeated repairs.

Cosmetic Dentistry in Boca Raton
Get expert dental care and a personalized treatment plan designed for you.
3. Over-thin or overextended design (preparation and laboratory design)
What it looks like clinically
Veneers that are over-thin at the incisal edge can chip under normal use; overextended restorations that impinge on the gingiva create chronic irritation and can trap plaque. Clinically you may notice a ragged or translucent incisal edge, marginal gaps that collect food, or soft-tissue redness and bleeding around the margins. Over-polished thin porcelain may superficially look fine but can fail structurally once functional stresses begin.
Why it happens
Design mistakes occur at two points: tooth preparation and laboratory communication. Excessive reduction to achieve a particular aesthetic can leave ceramic too thin to withstand occlusal forces. Conversely, insufficient reduction may force the lab to over-contour or over-extend margins, harming periodontal health. Clear, conservative preparation principles and precise margin design are essential; the wrong choice of material for a given thickness and margin anatomy further compounds the risk.
Typical correction path
The remediation path depends on the specific flaw. If margins are overextended and causing inflammation, the clinician may perform minimally invasive margin recontouring or, more commonly, request a remake with corrected margins and tissue management. If the veneer is structurally compromised because it is too thin, a remake in a stronger ceramic or with adjusted thickness is needed. Patients who prioritize minimal prep or no-prep veneers should be counseled on when that choice is or is not appropriate for long-term function.
Material choices and design considerations
Matching thickness with material strength and margin placement is critical. Some ceramics tolerate thinner cross-sections; others require more bulk. For clinicians and patients weighing options, the discussion around the best material for dental veneers helps clarify when a conservative design is safe versus when a stronger material or additional tooth preparation is advisable.
| Root Cause | Typical Clinical Signs | Usual Correction Path |
|---|---|---|
| Inadequate bonding / contamination | Debonding, sensitivity, margin staining | Re-bond under isolation or remake; hygiene coaching |
| Bite interferences | Fractures, chipped edges, high spot sensations | Occlusal adjustment, equilibration, nightguard, remake |
| Design errors | Thin edges, overextended margins, tissue irritation | Remake with adjusted prep and material choice |
4. Parafunctional habits: grinding, clenching, and destructive behaviors
What it looks like clinically
Parafunctional habits lead to repeated microtrauma. Clinically the veneer may show edge chipping, opposing tooth wear, and multiple small cracks visible under magnification. A patient report of morning jaw soreness, broken restorations on several occasions, or the habit of biting pens and opening packages with teeth points strongly to this cause. In some severe cases the ceramic is intact but underlying tooth structure is compromised, leading to sensitivity or fracture.
Why it happens
Grinding and clenching place repetitive cyclic loads beyond what veneers are designed to sustain, particularly thin ceramic veneers. These forces cause fatigue failure over time, and if the parafunction starts or changes after placement (for example, due to stress or medication changes), failures can occur early. Habitual use of teeth as tools concentrates force on small areas and accelerates ceramic breakage.
Typical correction path
Management begins with behavior identification and protective strategies. A custom-fitted nightguard reduces nocturnal forces and often prevents additional damage. In active failure, clinicians weigh the risk of simple repair versus replacing multiple restorations with designs and materials that tolerate higher loads. For many patients, a staged plan — remaking the most vulnerable pieces and fitting a nightguard while monitoring wear — balances cost, comfort, and durability. Expectation-setting is crucial: nightguards reduce risk but do not eliminate all mechanical failures if parafunctional behavior continues unabated.
Adjunctive therapies and long-term protection
In addition to nightguards, some clinicians recommend stress management techniques, referral to behavior specialists, or even occlusal splints used during daytime activities for extreme cases. Practical protective measures such as avoiding using teeth for non-food tasks should be emphasized. A short practical step is keeping a soft dental wax on sensitive areas temporarily while definitive protection is made.
Cosmetic Dentistry in Boca Raton
Get expert dental care and a personalized treatment plan designed for you.
5. Chronic inflammation from hygiene or margin issues
What it looks like clinically
Chronic inflammation usually manifests as red, swollen gingiva around the veneer margins, bleeding on probing, and progressive pocketing. Patients may also complain of a persistent bad taste or halitosis localized to one area. Over time, this environment undermines both the cement seal and the periodontal attachment, increasing the risk of marginal breakdown and eventual failure of the restoration.
Why it happens
Two mechanisms are most common: poor plaque control and poorly finished margins that trap debris. If the lab overextends margins beneath the gum or if the restoration’s emergence profile creates plaque-retentive ledges, inflammation will persist despite patient effort. Material biocompatibility matters less than fit and finish; however, some materials present smoother surfaces that are easier to keep clean. A proactive approach reviews both patient hygiene technique and the marginal integrity of the restoration when inflammation appears.
Typical correction path
Initially, the clinician will improve hygiene: targeted instruction, professional cleaning, and short-term monitoring. If inflammation resolves, continued maintenance may be enough. If redness persists, the restoration’s margins are re-evaluated; small overhangs can sometimes be corrected with careful polishing or minimally invasive margin recontouring. When the fit is fundamentally flawed, the predictable solution is a controlled remake with improved margin placement and a focus on an emergence profile that the patient can clean effectively. Choosing an appropriate substrate and margin location during the design phase prevents many of these issues.
When considering material choices and their interaction with tissue health, many patients inquire about different ceramic options and their structural strengths. A thoughtful selection of materials and a clear understanding of why are veneers bad scenarios helps temper unrealistic expectations and identifies which materials and margin strategies are safest for long-term periodontal health.
Managing expectations: realistic outcomes after early failure
Patients often expect a single fix. In reality, resolving early veneer failure can be incremental: stabilize the immediate problem (remove a fractured piece, re-bond a loose veneer), then diagnose the root cause, and finally implement preventive steps (protective appliance, remake, or hygiene change). Timeframes vary. A rebond can be done same-day in many cases; remakes require impressions or scans, lab time, and tissue healing, so plan several weeks to a few months for a complete resolution. Financially and practically, the most important part is a transparent plan that explains which outcomes are likely and what will be covered by warranty or clinic policies.
How a structured diagnostic workflow prevents repeat failures
A consistent workflow reduces guesswork:
(1) collect history and symptoms.
(2) perform an intraoral exam and radiographs.
(3) mount models when occlusion is a concern.
(4) remove and inspect failed restorations when appropriate.
(5) create a tailored corrective plan.
This framework differentiates cases that need simple repairs from those requiring full remakes and protective strategies. For practices focused on long-term oral health rather than quick fixes, this method ensures every decision—from material selection to nightguard fabrication—aligns with the patient’s goals and risk profile.
A Methodical Path to Restoring Your Smile
When Veneers Fail Early, the most effective solution is a diagnostic approach that looks beyond the surface. Preventing future complications starts with a thorough assessment of your bite, periodontal health, and daily habits before a single restoration is placed. By identifying the specific failure mode—whether it is a bonding error, an occlusal interference, or a design flaw—clinicians can implement evidence-based corrections that protect your long-term oral health.
Next Steps for Long-Term Success:
-
Identify & Treat: Address the immediate breakage or sensitivity while diagnosing the root cause.
-
Behavioral Protection: Adopt protective measures like nightguards and avoid using teeth as tools.
-
Expert Consultation: Seek a practice that prioritizes comprehensive diagnostics and structured follow-up protocols.
Don’t settle for repeated repairs. Choosing a path rooted in precise planning and specialized maintenance ensures your second chance at a perfect smile is the one that lasts.
Common Inquiries
? What are common mistakes practices make that increase early veneer failure?
- A practical example: a patient whose veneers chipped within two weeks often had a single premature contact on an upper lateral incisor that was not adjusted after final seating.
- The actionable recommendation is to institute a mandatory occlusal test and rubber-dam isolation checklist for every veneer cementation; doing both reduces the risk of early mechanical failure dramatically.