The Veneer Try-In Checklist provides the essential steps to approve the appearance, fit, and function of your restorations before permanent bonding. By methodically evaluating shade under different lights, tooth symmetry, and speech patterns during this low-risk appointment, you can request adjustments that prevent costly surprises later. This guide explains how to use the checklist to ensure your final veneers meet your aesthetic goals and provide long-term comfort.
The purpose of a try-in and why the try-in is critical
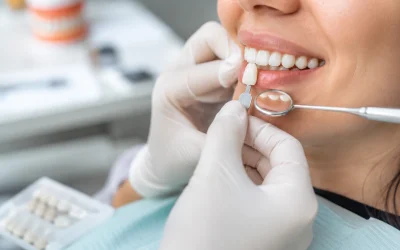
A veneer try-in is the last opportunity to test restorations without committing permanently. It’s a low-risk appointment where provisional or final ceramic restorations are seated temporarily using a water-soluble medium so both patient and clinician can evaluate esthetics and function together. The focus is not only “does it look good?” but also “does it feel right?” — how it affects speech, chewing, and hygiene. In cosmetic and restorative dentistry we always prioritize predictable long-term outcomes rather than quick fixes, and the try-in is the practical safeguard against avoidable mistakes. Thinking of veneers as a partnership between clinician and patient helps you use this moment effectively: you are reviewing not just a shade, but proportions, midline, incisal edge length, and whether the texture and luster reflect natural light as you expect.
Preparing for the try-in: expectations, preparations, and The Veneer Try-In Checklist
Before the appointment, discuss goals and review any smile designs or digital mockups. Bring photographs under everyday lighting and, if possible, a daytime selfie in the smile you love. Your clinician may have prepared a diagnostic wax-up or digital preview — these become the reference during the try-in. Also confirm if the veneers are traditional porcelain or a no-prep/ultra-thin option because preparation affects translucency and edge behavior. If you are curious about the principles behind tooth preparation and how your teeth were prepared for veneers, review resources that explain what happens when teeth are prepared for veneers and how that influences fit and aesthetics. For example, you can read about how teeth are prepared and what to expect from that step in the treatment sequence: teeth prepped for veneers.
Set realistic goals
Bring reference images but be open to clinician feedback: facial proportions, lip support, and occlusion are three constraints that may require refinement. The try-in helps reconcile desired changes with practical function. Use the checklist during the appointment and ask the dentist to demonstrate differences with the restorations in place versus your current smile.
Shade and lighting: approving color under multiple conditions (part of The Veneer Try-In Checklist)
Shade approval is often the top concern, but color behaves differently depending on light quality and surrounding tissues. During the try-in you want to approve shade under at least three lighting scenarios: natural daylight (north-facing light or near a window), a clinical overhead light (cool, high-intensity), and a warmer indoor lamp that mimics evening environments. Pay attention to value (lightness), chroma (saturation), and translucency at the incisal edges. Ask to see the veneers with lips relaxed and smiling to observe how adjacent teeth and the gingival display affect perceived color. The clinician may use shade tabs, cross-polarized photos, or try-in pastes to simulate final cement colors. If you want a deeper understanding of the whole fabrication sequence and where try-in fits into the timeline, there are helpful overviews of the complete dental veneers workflow that explain the stages you will experience: dental veneers process.
Practical check: how to judge shade
Stand up near a window and have someone photograph your smile from several distances. Compare the photos with and without the restorations in the mouth. Consider whether you want a slightly brighter shade for photos versus a natural daytime appearance; your final decision should favor everyday environments rather than one-off photos. If the shade feels off in any light, request an adjustment — small changes in ceramic layering or surface staining can produce meaningful differences before bonding.
Proportions, symmetry, and incisal edge length
Tooth proportions and symmetry define whether the smile looks balanced. During the try-in assess each tooth’s width-to-height ratio and the overall arc. The central incisors typically provide the dominant visual anchor, and their length relative to the lower lip can greatly change perceived age and smile harmony. Incisal edge length also affects function — too long may create premature contacts and too short can make teeth appear worn. Always examine the smile both at rest and in a full smile to ensure harmony of the smile arc (how the edges of the upper teeth follow the curve of the lower lip). If proportions or symmetry feel off, ask the lab to adjust contouring or to rework minor length differences before bonding.
Tips for evaluating incisal edges
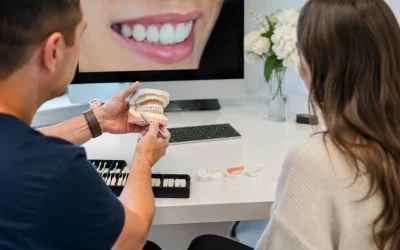
Ask the dentist to show a side-by-side comparison with a mock-up or your natural teeth visible to judge incremental changes. Small increments matter: a millimeter adjustment in incisal length can change tooth contact patterns and speech. If you grind or clench, discuss protective options — sometimes a slightly adjusted incisal design will lower risk of future chipping.
Embrasures, surface texture, and luster: surface anatomy matters in The Veneer Try-In Checklist
Embrasures (the triangular spaces between teeth), surface texture, and luster determine whether restorations look natural. Flat, overly smooth surfaces reflect light unnaturally; conversely, irregular textures that mimic natural enamel create convincing life-like reflections. During the try-in, view the veneers under a range of light angles and ask the clinician to point out how the surface texture interacts with surrounding teeth. Embrasure size should allow natural food escape and proper cleaning. If embrasures are too tight you risk trapping food; if they are too open the esthetic unity may suffer. Ask for subtle surface characterizations such as microgrooves, mamelons near incisal edges, and appropriate glazing to match neighboring teeth. Surface adjustments can be made in the lab or, in minor cases, via in-office polishing/glazing prior to final bonding.
Practical comparison
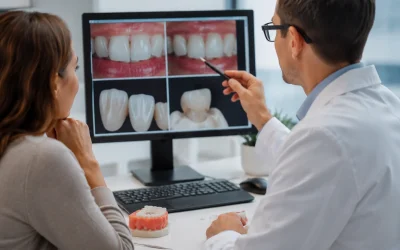
Ask to see a magnified photograph of the restorations next to adjacent teeth; this helps evaluate texture differences that are hard to judge with the naked eye. If the surface looks too glossy, request a finish with slightly more microtexture. Conversely, if the restoration appears dull, discuss additional glazing to increase luster.
Midline, smile arc, and gum harmony in The Veneer Try-In Checklist
Midline alignment and smile arc have outsized effects on perceived attractiveness. The dental midline should ideally align with the facial midline and the philtrum; small shifts under 2 mm can be acceptable, but larger offsets are noticeable. The smile arc — the relationship between incisal edges and the curvature of the lower lip — should create a youthful, flowing appearance. Gingival (gum) harmony is equally important: uneven gingival heights or visible asymmetry can undermine excellent porcelain work. During the try-in evaluate how the gingival margin meets the restoration margin and whether any soft-tissue recontouring is necessary before final cementation. If gum levels need refinement, that is addressed before or in conjunction with final bonding; do not bond until you are satisfied with the tissue interface.
Clinical note
In many cases the clinician will use a mock-up bonded temporarily to your teeth to preview gingival display and lip support. This allows for adjustments in shape and length that influence the smile arc before ceramic is finalized.

Cosmetic Dentistry in Boca Raton
Get expert dental care and a personalized treatment plan designed for you.
Phonetics and speech testing: the “F/V/S” sounds
Phonetic testing is frequently overlooked, but it is an essential part of The Veneer Try-In Checklist. Sounds like F, V and S reveal relationships between incisal edges and the lower lip, as well as labioincisal thickness. During the try-in, the dentist will ask you to pronounce words containing those phonemes — for instance, repeating words like “fifteen” and “safe” to observe edge-lip contact and the presence of any whistling or lisping. If an S produces a lisp, the incisal edge or anterior spacing may need adjustment. Labial thickness that is too bulky can affect speech and lip posture; conversely, overly thin veneers may fail to provide desired esthetic shaping. The try-in lets you test speech without permanent bonding and request changes if necessary.
Actionable checks for speech
Speak naturally and read a short paragraph aloud while the clinician observes. If you hear any altered speech quality, ask the clinician to show how minor contour changes will affect phonetics — these are typically easy to adjust before final cementation.
Contacts, flossing feel, and how to test cleaning in the try-in
Proper interproximal contacts are vital for food control and periodontal health. During the try-in, test contacts by flossing between teeth; ideal contacts allow a clean snap without shredding the floss. Ask the clinician to check contacts with dental floss and explorer and to demonstrate how the contacts feel on each side. If contacts are too tight, floss may snag and leave fiber; if too loose, food will pack and gum irritation may result. The try-in is the optimal time to request changes to contact tightness because once bonded, altering contacts may require removal or rework of the restoration.
Practical advice
Bring your own floss and test it during the appointment. Describe any previous issues you have with food impaction so the team can tailor contact shape to your habits and anatomy.
Bite comfort in excursions and occlusal testing on The Veneer Try-In Checklist
Evaluating your bite during lateral and forward movements is a non-negotiable step to prevent tooth pain or porcelain fractures after bonding. During the try-in, your dentist will guide you through sliding motions to detect “high points” or interferences. If you notice any discomfort or a change in your natural bite pattern, the restorations must be adjusted or reshaped before they are permanently attached.
Testing Protocol
To ensure long-term comfort, follow these steps during your appointment:
-
Bite down gently to check the center position.
-
Move your jaw side-to-side and forward (excursions) to feel for snags.
-
Report any muscle tension or immediate tooth sensitivity.
-
Use articulating paper: If a contact feels “heavy,” ask the clinician to mark it with paper to pinpoint the exact adjustment needed.
The Veneer Try-In Checklist: Summary Table
| Checklist Item | What to Look For | Common Adjustments |
| Shade & Lighting | Match in daylight, clinical light, and warm indoor light. | Layering tweaks, stains, or glaze adjustments. |
| Proportions & Symmetry | Width/height balance, incisal length, and smile arc. | Lab recontouring or precise millimeter changes. |
| Function & Hygiene | Clear speech (F/S sounds), floss snap, and bite comfort. | Contact adjustment, occlusal polishing, or night guard. |
Documenting changes and communicating with the lab
Clear documentation during the try-in is crucial. If you or the clinician want changes, take intraoral photographs from multiple angles and have the dentist annotate exactly what needs alteration. Some labs prefer a written request with photos, others will accept digital marking systems. Be specific: identify which teeth, what surface, and quantify changes where possible (for example “reduce incisal length of tooth #9 by 0.8 mm” or “increase embrasure openness between #8 and #9 by 0.5 mm”). Also discuss cement shade selection because luting agents change final color; this decision is confirmed at try-in when you can preview the effect with try-in paste or a provisional shade guide.
Why communication matters
Miscommunication with the lab is the most common cause of rework. A try-in that is documented thoroughly with photos, measurements, and a brief list of adjustments reduces the chance of needing to remove bonded restorations later. If you want an overview of pros, cons, and realistic expectations for veneers before finalizing choices, reputable patient-focused resources that weigh benefits and limitations can be helpful to review: dental veneers pros and cons.
When to accept the try-in and when to request more work
You should accept the try-in when three conditions are satisfied: (1) esthetics align with your goals across multiple lighting conditions, (2) function — speech, interproximal contacts, and excursions — is comfortable and secure, and (3) the periodontal interface looks healthy and harmonious. If any of these are unmet, request specific, limited adjustments. Ask whether the changes require a new laboratory phase or can be accomplished chairside. Remember: the try-in is the last low-risk moment to request changes before irreversible bonding; once bonded, corrections may mean removing ceramic or performing more extensive treatment.
Typical minor fixes versus major revisions
Minor fixes include surface glazing, small modifications to contacts, or subtle texture refinements. Major revisions might involve recutting the incisal length, significant shade layering changes, or correcting the shape of multiple teeth — these typically require sending the case back to the lab. Your dentist should explain whether requested changes are minor or major so you understand the timeline and implications.
Final checklist to use during your try-in (quick reference of The Veneer Try-In Checklist)
Before giving your final approval, walk through these points methodically with your dentist to ensure a perfect result. We recommend requesting photographic proof of any agreed-upon changes to guarantee accuracy during the final fabrication.
-
Shade: Verify the color in natural daylight, cool clinical light, and warm indoor settings.
-
Proportions & Symmetry: Confirm the width-to-height balance and incisal edge length.
-
Anatomy: Evaluate surface texture, luster, and the spacing between teeth (embrasures).
-
Alignment: Assess the midline and how the teeth follow your smile arc.
-
Speech: Test your phonetics by repeating “F,” “V,” and “S” sounds aloud.
-
Health & Bite: Floss to check contact tightness and test bite comfort through all movements.
What Happens Next? Once the evaluation is complete, you will either proceed to final bonding or document specific corrections for the lab. Using The Veneer Try-In Checklist is your final safeguard to eliminate surprises and ensure your new smile is as functional as it is beautiful.
Cosmetic Dentistry in Boca Raton
Get expert dental care and a personalized treatment plan designed for you.
After the bonding: maintenance and long-term care
Once veneers are bonded, follow-up care focuses on protecting the restorations and maintaining periodontal health. This includes wearing a dentist-prescribed night guard if you brux, using non-abrasive toothpaste, and attending regular hygiene visits to remove biofilm at the restoration margins. If you notice any change in how your bite feels or persistent sensitivity, contact the practice promptly — early evaluation often prevents more complex repair. Periodic photographic documentation at recall visits helps monitor wear and stain patterns so minor refinements can be made proactively.
The Veneer Try-In Checklist is your roadmap to a successful final bonding: a structured, step-by-step review of shade, proportions, texture, midline, phonetics, contacts, and occlusion. Use the try-in to request adjustments while the risk is low and before anything becomes permanent. With careful documentation, clear communication with your clinician and the lab, and a methodical use of this checklist, you’ll maximize the chance of a beautiful, functional smile that lasts.