If you are considering Rushed Veneers Before a Wedding/Trip, the most important rule is to prioritize stability over speed. While it is possible to expedite the process, rushing the final delivery without proper biological healing or lab calibration often leads to mismatched shades and uncomfortable temporaries. A successful expedited plan focuses on gum health, precise photography, and built-in contingency windows. By following a structured timeline, you can achieve a camera-ready smile for your big event without the risk of an emergency dental visit while you are away.
Why timing matters: core variables that determine success
Veneer treatment is a multi-phase process that depends on biological healing, precise communication with the lab, and methodical clinical assessments. The key variables determining the timeline from consultation to permanent veneers include periodontal (gum) health, photographic shade-matching, lab turnaround time, the quality of the provisionals, and the time required for occlusal (bite) refinement. Rushing any of these steps increases the risk of discomfort, shade mismatches, provisional breakage, or the need for additional adjustments after you have already traveled or committed to an event.
Gum health and tissue stability
Inflamed or unstable gum tissue will change shape as it heals. If active gingivitis or periodontal pockets are present during preparation, the gingival margin may recede or swell as it heals, altering the emergence profile and leaving the margins exposed or creating gaps. Consequently, many clinicians prioritize treating inflammation, allowing the tissues to stabilize for at least two to four weeks following professional hygiene therapy before taking final impressions and shade matching. In accelerated cases, we closely monitor tissue response and may defer finalization until the healing window has closed.
Photography, shade selection, and communication
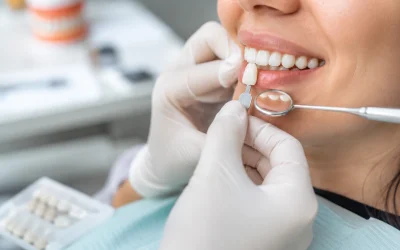
Excellent shade matching requires controlled photography, proper lighting, and time to coordinate with the ceramist. A hurried shade-matching process—characterized by rushed photos, a single low-resolution snapshot, or attempting to select a shade in a brightly lit office without calibrated equipment—increases the risk of a visible mismatch. Since these photographs travel with the case, the lab requires high-definition images and shade tabs to accurately reproduce translucency and surface texture. Allocating one or two extra appointments for photography and digital shade verification dramatically reduces the risk of discrepancies that may become obvious in photos taken at a wedding or while traveling.
How Lab Turnaround and Scheduling Synchronize
Lab turnaround is a predictable timeline, yet it is far from instantaneous. Even the most efficient dental laboratories require adequate time for fabrication, glazing, and quality control—typically spanning several business days. While expedited lab services are available at an additional cost, they still carry the risk that the first set may require remakes or fine-tuning.
When planning for a wedding or major trip, it is crucial to build in a buffer period. Avoid scheduling your final seat appointment the day before your departure. If the lab needs to perform a remake, you will want sufficient time for a second try-in and any necessary minor adjustments.
Try-in adjustments and provisional behavior
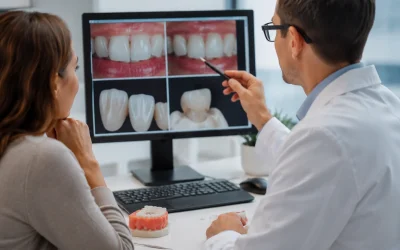
Once the provisionals or try-ins are placed, your clinician needs time to evaluate aesthetics and function, and refine the shape and contacts. Try-ins often reveal subtle discrepancies in the midline, incisal length, or phonetics that are ideally addressed before permanent cementation. Provisional restorations also serve as a functional test; if a provisional causes soreness, inflammation, or fractures, you will need time to resolve those issues prior to travel or an upcoming event.
To provide a deeper understanding of the step-by-step protocol and why each stage matters, our clinic walks patients through the entire veneer process in advance to ensure there are no surprises.
Common problems when veneers are rushed
When veneers are rushed, the most common issues are:
1) shade mismatch in photos and direct lighting.
2) marginal gaps due to healing tissues.
3) temporaries that fracture or debond while you’re away.
4) bite-related soreness or chipped porcelain from inadequate refinement.
5) increased anxiety and dissatisfaction because expectations weren’t aligned.
Each of these problems has predictable causes and practical mitigations—if you plan conservatively from the start.
Shade mismatch examples
Shade mismatch can be subtle—slight differences in translucency or surface texture that look fine in the dentist’s chair but dramatic in flash photography. For brides, grooms, and travelers who will be photographed, these differences stand out. Photographic shade checks and re-calibration with the lab prevent this. If you want to brighten your teeth before veneers, an appropriate timeline for whitening should be discussed early because whitening changes the target shade for the lab.
Decision map: when to choose whitening first and when to postpone finals
Deciding whether to whiten before veneers or wait until after seating affects scheduling. Whitening is best done at least two weeks before shade selection so the final shade is stable. If you plan bleaching before veneer fabrication, schedule whitening early in your timeline and confirm stability before the photography/shade step. If your wedding or trip is imminent and whitening would push the schedule, it may be wiser to accept a slightly warmer shade for the veneers or delay permanent placement until after the event.
Recommended decision points
- If you plan whitening: perform whitening at least 3–4 weeks before shade selection, then verify the new baseline.
- If your gum health is unstable: prioritize periodontal hygiene and postpone final impressions until tissues have healed for at least two weeks.
- If lab timing is tight: set conservative expectations and ask the lab for overnight shipping or an expedited run only if you have room for a possible remake.
- If you travel immediately after veneer delivery: consider postponing final cementation and using robust temporaries instead.
Managing temporaries safely for travel and events
Temporaries are a safety net; they protect teeth while the lab fabricates final veneers and allow for esthetic previews. But temporary restorations are not as durable as final ceramics and may debond or fracture under stress, especially during travel. If you must travel with temporaries in place, warn your clinician and request reinforced provisionals, provide written aftercare instructions, and pack a small emergency dental kit (superglue is not recommended—bring dental wax, floss, and the clinic’s emergency contact info).
When temporaries are used, avoid hard or crunchy foods, use a nightguard if clenching is a concern, and plan a follow-up appointment soon after your return if finals were postponed. A common practical case: a patient traveling internationally two weeks after provisional placement chose reinforced bis-acryl temporaries and avoided chewy foods; they returned for final seating without complications. Your team should provide explicit guidance tailored to your provisional material and planned activities.
When to postpone final cementation
Postpone final cementation if any of the following apply: unresolved gum inflammation, unstable shade after whitening, unresolved bite or phonetic issues during try-in, or imminent travel that prevents immediate follow-up care. It is better to attend your event with secure, well-communicated temporaries than to risk permanent veneers with unresolved variables that could cause emergency work while you’re away.

Cosmetic Dentistry in Boca Raton
Get expert dental care and a personalized treatment plan designed for you.
Practical timeline templates for common scenarios
Below are three pragmatic timelines depending on how close your event is and how much flexibility you have. Each timeline assumes initial consultation, diagnostic records, and a discussion of risks and contingency plans.
Scenario A — Comfortable timeline (ideal)
Consultation and hygiene: 6–8 weeks before event. Whitening (optional): start 5–6 weeks before shade selection. Photography/shade and provisional fabrication: 4 weeks before event. Try-in and adjustments: 2–3 weeks before event. Final cementation and bite refinement: 1–2 weeks before event. This timeline allows for healing, lab communication, and at least one remake if needed.
Scenario B — Moderate acceleration
Consultation and hygiene: 4–6 weeks before event. Whitening done 3–4 weeks before shade selection. Photography and provisional fabrication: 2–3 weeks out. Try-in and minor adjustments: 10–14 days before event. Final cementation only if tissues and shade are stable; otherwise maintain reinforced temporaries during the event and schedule finals after.
Scenario C — Near-imminent event (rush)
If you have less than two weeks, avoid final cementation. Instead, focus on stabilizing gums quickly with hygiene, create reinforced provisionals, and capture photos for a future lab run. Be candid about the limitations: rushed finals are the highest risk for mismatch, discomfort, and provisional failure.
Tools and Roles: Defining Responsibilities to Ensure Predictable Outcomes
Successful rapid cases require seamless coordination: the patient must follow hygiene and behavioral recommendations; the dentist must manage tissue health, take controlled photographs, and perform careful try-ins; and the lab must fabricate high-quality restorations. Clear instructions and shared expectations minimize unexpected results. If you want to learn more about porcelain options and their impact on longevity, discuss material choices with your clinician—as porcelain varieties affect how precisely the lab can match translucency and luster.
When reviewing treatment options, patients often ask about porcelain veneer specifics. Our team provides a clear breakdown of the benefits and maintenance for porcelain veneer cases in Boca Raton, allowing you to choose the right ceramic for your timeline and aesthetic goals.
Contingency planning for travel and emergencies
Always prepare an emergency plan if you’re traveling with provisional or newly cemented veneers. Before you leave: get written aftercare instructions from your dentist, a prescription for temporary pain or anti-inflammatory medication if indicated, and contact information for emergency care in your home area. For international travel, identify a local dentist who can be called if a veneer debonds or fractures. Pack the small kit your dentist recommends and avoid high-risk foods and habits.
Practical contingency steps
If a temporary debonds while traveling, rinse the tooth and the temporary, keep both in a safe container, and avoid pushing the restoration back with adhesives not intended for dental use. Call your clinician for specific instructions; many offices will provide temporary measures until you return for repair. If a permanent veneer shows early signs of failure, document the problem with clear photos under natural light and contact your dentist immediately.
Bite refinement and long-term comfort
One of the biggest sources of post-delivery discomfort is an unrefined occlusion. Bite refinement is iterative: your dentist adjusts contacts and occlusion during try-in and after cementation to ensure the veneers do not interfere with chewing or cause point contacts that lead to sensitivity or chipping. Rushing to cementation without thorough bite checks can produce soreness, especially for patients with bruxism or heavy occlusion. When time is short, preserve the option to fine-tune after the event rather than forcing a one-time seating that risks long-term problems.
Another frequent concern is veneer retention and unexpected loss. For real-world guidance on how restorations behave over time and what to do in the event of a debond, review our detailed resource on the 6 root causes of veneers coming off. Understanding these factors helps you manage expectations and maintain a stable smile even while traveling.
Key variables, risks, and practical mitigations
| Variable | Risk if rushed | Practical mitigation |
|---|---|---|
| Gum health | Margin changes, exposure | Treat inflammation first; allow 2–4 weeks healing |
| Shade & photography | Shade mismatch in photos | Controlled photos, multiple checks with lab |
| Temporaries | Debonding & fracture | Reinforced provisionals, strict diet & care |
Practical patient cases: comparisons and examples
Case example 1: A patient had a 10-week lead time before an overseas wedding. They completed hygiene and whitening early, used a robust provisional for two weeks, and had final seating three weeks before departure. The extra buffer allowed a minor lab tweak that corrected translucency and avoided a photo mismatch.
Case example 2: A patient with only 7 days before a local event received provisionals and elected to delay final cementation until after the event; they traveled without complications and returned for final seating with a predictable result. These real scenarios highlight that conservative planning typically reduces risk and anxiety.
Cosmetic Dentistry in Boca Raton
Get expert dental care and a personalized treatment plan designed for you.
Strategic Planning for a Camera-Ready Smile
Managing rushed veneebefore a wedding/trip successfully requires balancing aesthetic goals with biological reality. To ensure a stress-free experience, prioritize early hygiene treatments, settle on your desired shade early, and maintain open communication with your dentist regarding your deadlines. By accepting a structured timeline—or opting for high-quality provisionals if time is too tight—you avoid the risks of discomfort and poor shade matching.
Common Inquiries
? How do lab remakes affect a rushed timeline?
? What are the hidden costs of rushing veneers?
Rushed treatments can lead to unforeseen expenses in several ways. For example, a patient may pay an expedited lab fee and still require an unplanned remake if photos reveal a shade mismatch; such remakes add both laboratory expenses and additional chair-time charges. Hidden costs can include expedited shipping, overnight logistics, emergency visits while traveling, or the replacement of fractured provisionals.
It is advisable to request a comprehensive cost estimate for expedited services and potential remakes upfront, then compare those costs to the alternative of delaying the final seat appointment. In many cases, a slight delay in the treatment timeline reduces total expenses and minimizes the likelihood of requiring emergency dental work during travel.
? How to choose a provider for fast yet reliable veneer work?
Selecting a provider when time is limited requires prioritizing clinical experience and established systems. For example, a six-week treatment plan is often most successful when utilizing a practice with structured lab protocols and documented shade verification; these systems reduce the risk of remakes and ensure a seamless delivery.
Key steps for patients include inquiring about a provider’s expedited workflows, the use of calibrated photography, and their specific lab communication methods. Requesting examples of successful accelerated cases and a written timeline that includes contingency plans allows for an objective comparison between providers before committing to treatment.
? Are certain veneer materials better for rushed cases?
Material choice directly affects how a veneer responds to shade adjustments and polishing. For instance, a four-week timeline often favors high-strength ceramics that require fewer glazing cycles, allowing for faster laboratory fabrication; however, this choice typically involves a trade-off in natural translucency.
It is essential to prioritize aesthetic goals: if an upcoming event involves high-resolution photography and a natural appearance is the primary objective, additional time should be allocated for layered, highly translucent porcelain. Conversely, if speed and durability are paramount, a robust ceramic with conservative translucency may be the most suitable option. Reviewing photos of previous cases involving the selected material is always recommended to ensure alignment with patient expectations.